
Minimum Size Concrete Equipment Pad for Pump, Filter, Heater & Salt Cell
Planning the layout for your pool components requires careful attention to the minimum size concrete equipment pad for pump, filter, heater & salt cell systems. A well-designed pad prevents future maintenance headaches and ensures your equipment operates safely and efficiently. You need enough room to access valves, clean filters, and service electrical components without feeling cramped.
This article provides the specific dimensions and spacing requirements necessary to build a functional foundation for your backyard pool setup. By following these professional standards, you will avoid common installation errors and protect your investment for years to come. Proper planning now saves significant labor and cost during future repairs or upgrades.
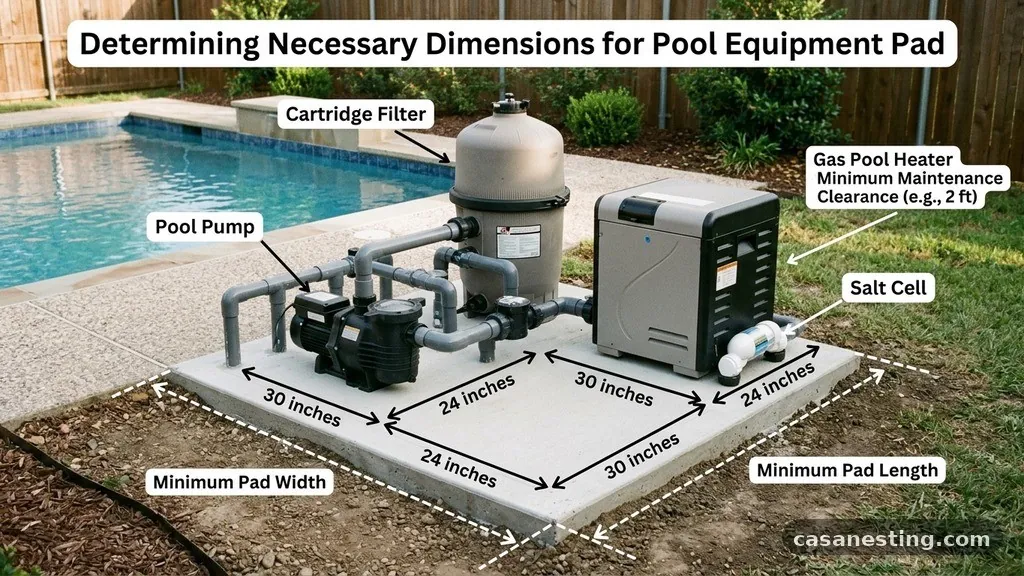
For a standard residential setup, the absolute minimum size concrete equipment pad for pump, filter, heater & salt cell is 3 feet by 6 feet. While this footprint fits the base of the equipment, it is often too small for comfortable servicing. Industry experts typically recommend a 4 feet by 8 feet pad to accommodate the necessary clearances for plumbing and electrical access.
If you are installing a gas heater, you must account for additional clearance for ventilation and gas line connections. Cramping these devices together on a undersized slab creates a fire hazard and makes routine maintenance, such as backwashing the filter or inspecting the salt cell, nearly impossible.
Determining Necessary Dimensions
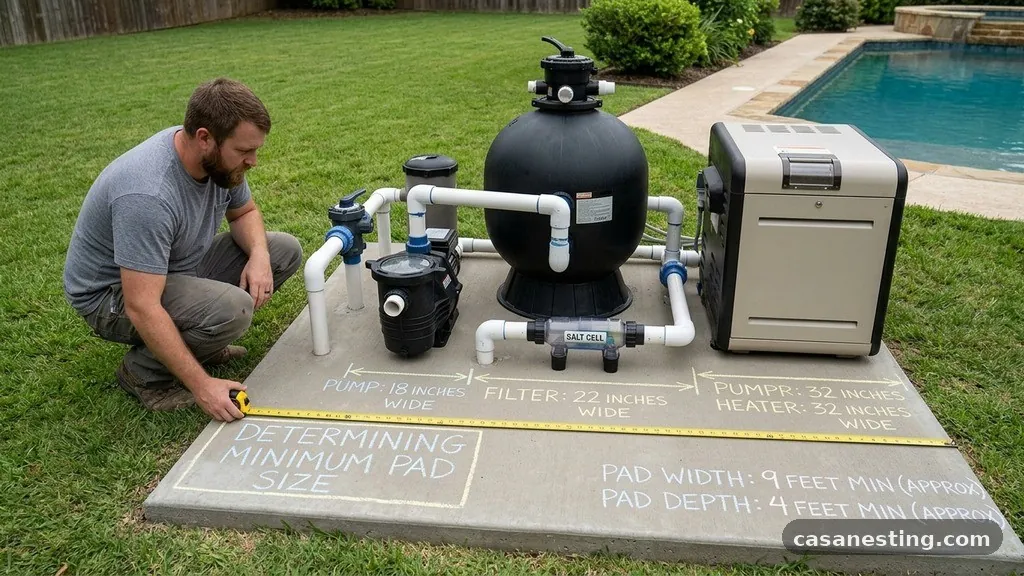
When calculating the space you need, start by laying out the physical dimensions of each component. A pool pump usually requires a 12-inch by 24-inch footprint, while a cartridge filter requires a 24-inch diameter circle of space.
You must also account for the plumbing unions that connect these devices, which add roughly 6 to 8 inches of width between each unit. If you skimp on the width, you will find it difficult to turn valves or replace O-rings when they eventually leak.
The length of the pad is dictated primarily by the sequence of the plumbing. Water typically flows from the suction pipe into the pump, then through the filter, then through the heater, and finally through the salt cell.
Each transition requires pipe fittings that occupy a specific linear distance. A standard 4-foot by 8-foot pad allows for a logical, linear flow that minimizes pipe bends and friction loss.
Accounting for Heater Clearance
Gas heaters and heat pumps have specific requirements that dictate the footprint of your concrete pad. Most manufacturers require at least 12 to 18 inches of clearance on the sides for airflow and servicing.
If you place a heater too close to a wall or another piece of equipment, it may overheat or fail to ignite properly. Always consult the manufacturer’s installation manual for the specific model you intend to purchase.
Heat pumps are significantly larger than gas heaters and often require a much wider base. A standard heat pump can be 30 inches wide and 30 inches deep, taking up a significant portion of a small pad.
If your design includes a heat pump, you should increase your pad size to at least 4 feet by 10 feet. This ensures the unit has enough room to “breathe” and keeps the plumbing from becoming a tangled mess.
The Importance of Service Access
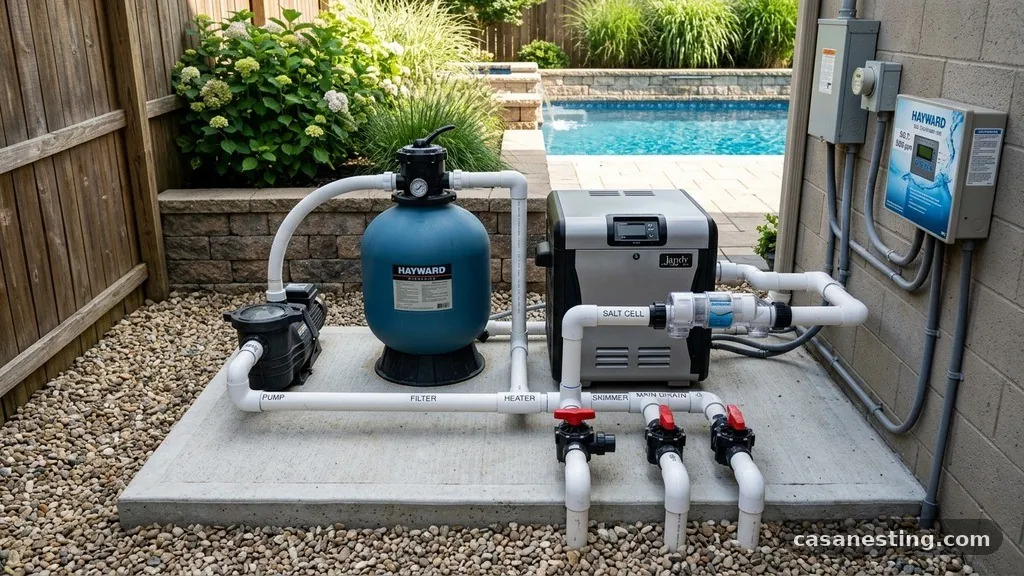
Maintenance is an inevitable part of pool ownership, and your equipment pad design should reflect that reality. You need to be able to walk around at least three sides of the pad to reach unions, valves, and electrical boxes.
If you push the pad against a fence or a wall, you effectively lose access to the backside of the equipment. This makes simple tasks, like checking for salt cell leaks or tightening pump bolts, a frustrating chore.
Leave at least 24 inches of clear space around the perimeter of the pad whenever possible. This “service buffer” allows for the use of pipe wrenches and screwdrivers without hitting obstructions.
If your yard space is limited, try to orient the pad so the front-facing valves are easily accessible from the main walkway. A well-planned layout keeps the most frequently adjusted components, such as the pump basket and filter pressure gauge, in the most accessible position.
Electrical and Automation Control Integration
Modern pools often include complex automation control panels that require their own space on or near the equipment pad. These panels are typically mounted on a post or a wall behind the pad, but they require a clear path for conduit runs.
You must ensure that your concrete pad is large enough to support the vertical conduit risers coming up from the ground. If you crowd the pump and filter too closely, you may find it impossible to route the electrical wires safely.
Consider the location of your sub-panel as well. The National Electrical Code (NEC) specifies that there must be a clear working space in front of electrical panels for safety.
If your equipment pad is too small, you might accidentally place the pump or heater in the required clearance zone for the electrical panel. This violation can lead to failed building inspections and safety risks for anyone working on the system.
Concrete Thickness and Foundation Requirements
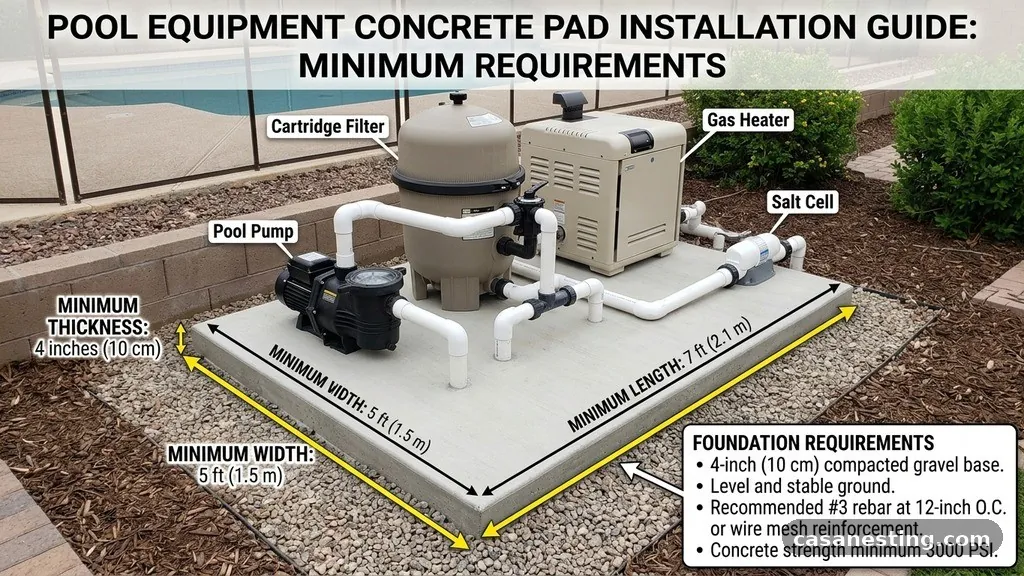
While the surface area is crucial, the thickness of the concrete matters just as much for long-term stability. A standard residential pool pad should be at least 4 inches thick to prevent cracking under the weight of the equipment.
If you live in an area with freezing winters, consider pouring a slightly thicker slab or using a reinforced concrete mix to handle ground movement. A cracked pad can shift the piping, leading to stress on the PVC joints and eventual leaks.
Prepare the sub-base with at least 4 inches of compacted gravel or crushed stone before pouring the concrete. This base provides drainage and prevents the pad from settling unevenly over time.
If the pad settles, the rigid plumbing pipes connecting your equipment will experience significant stress. A stable foundation is the cheapest insurance policy you can buy for your pool pump and heater.
Managing Vibration and Noise
Pool pumps and heaters generate constant vibration while running, which can be amplified if the equipment is mounted on a thin or poorly supported surface. You can mitigate this by using vibration-dampening pads under the pump motor.
If your pad is too small, you won’t have room for these extra accessories, forcing you to bolt the pump directly to the concrete. This direct contact often creates a humming noise that can be heard throughout the yard.
Consider the acoustic impact on your living space when choosing the location for the pad. If you place it near a bedroom window or a patio seating area, the noise will become a significant annoyance.
A larger pad allows you to install acoustic baffles or sound-dampening enclosures around the pump. These structures require their own footprint, which further emphasizes the need for a generous equipment pad size.
Comparison of Pad Sizes for Different Configurations
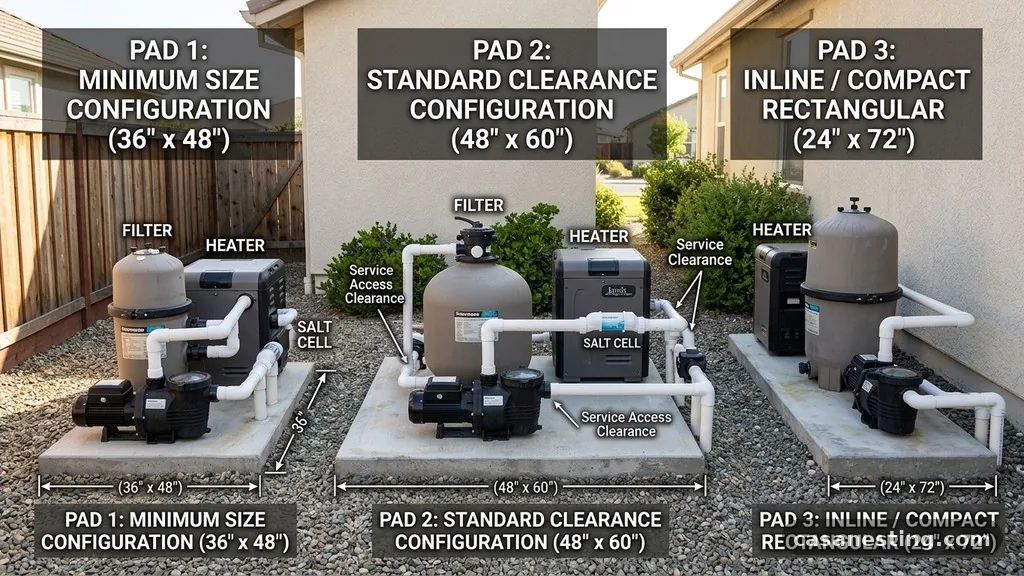
The following table compares the recommended pad sizes based on the complexity of your equipment setup. These dimensions assume you want enough room for comfortable servicing and proper ventilation.
| Equipment Setup | Recommended Minimum Dimensions | Best Practice for Serviceability |
|---|---|---|
| Basic: Pump & Filter Only | 3′ x 4′ | 4′ x 5′ |
| Standard: Pump, Filter, Salt Cell | 3′ x 6′ | 4′ x 8′ |
| Advanced: Pump, Filter, Salt Cell, Gas Heater | 4′ x 8′ | 5′ x 10′ |
| Premium: Pump, Filter, Salt Cell, Heat Pump | 4′ x 10′ | 6′ x 12′ |
Common Mistakes to Avoid
Many homeowners underestimate how much space the plumbing pipes actually occupy. You might think a 3-foot by 4-foot pad is sufficient, but once you add the pump, filter, and the necessary pipe loops to connect them, you will find you have zero room left.
Another common error is placing the pad too close to the pool itself. You want to keep the equipment close enough to minimize pipe friction, but far enough away to avoid splash-out from the pool.
Avoid pouring your pad in a low-lying area of the yard where water collects during rainstorms. If your equipment sits in standing water, the pump motor and electrical components will corrode prematurely.
If you cannot find a naturally high spot, consider pouring the pad on a raised concrete curb to keep the equipment a few inches above the surrounding grade. This simple step can add years to the life of your pool components.
Checklist for Equipment Pad Planning
Before you finalize your layout, use this checklist to ensure you haven’t missed any critical requirements for your installation.
- Confirm the manufacturer’s clearance requirements for your specific heater or heat pump.
- Ensure the pad is located at least 5 feet away from the pool edge for safety compliance.
- Verify that the pad allows for easy access to the filter drain plug and the pump basket.
- Check that there is enough room for the electrical conduit to enter the equipment without sharp bends.
- Confirm the pad is level to prevent uneven load distribution on the pump housing.
- Make sure the pad location does not block access to any other utility shut-off valves.
Frequently Asked Questions
How thick should the concrete be for a pool equipment pad?
A standard thickness of 4 inches is generally sufficient for residential pool equipment. If you are installing a very heavy commercial-grade heater or a large heat pump, you might consider increasing the thickness to 5 or 6 inches to ensure long-term durability.
Can I use pre-cast concrete blocks instead of pouring a pad?
You can use pre-cast pads for smaller setups, but they are often difficult to level and prone to shifting over time. A poured concrete slab provides a more stable, unified base that is less likely to crack or sink, which protects your plumbing from stress.
What is the best way to handle drainage around the pad?
Slope the ground around the concrete pad away from the slab to prevent water from pooling at the base. You can also install a small French drain or a gravel border around the perimeter of the pad to help manage runoff during heavy rain.
Do I need to ground the equipment to the concrete pad?
The equipment itself must be bonded to the pool’s equipotential bonding grid, which is typically a copper wire running around the pool. The concrete pad does not act as a grounding mechanism, but you must ensure your electrical installation meets local building codes regarding GFCI protection and grounding.
Should I cover the equipment pad?
A roof or enclosure can protect your equipment from sun and rain damage, significantly extending the life of the pump motor and electronics. If you build an enclosure, ensure it has plenty of ventilation, as gas heaters and heat pumps need constant airflow to function correctly.
Conclusion
Choosing the right dimensions for your equipment foundation is a vital step in maintaining a healthy and efficient swimming pool. While the absolute minimum size concrete equipment pad for pump, filter, heater & salt cell is 3 feet by 6 feet, opting for a larger 4-foot by 8-foot footprint will make your life significantly easier. You will have the space required to perform routine maintenance, access critical valves, and ensure your heater has the ventilation it needs to operate safely.
Take the time to measure your specific equipment and account for the necessary clearances before you pour. A well-planned, properly sized, and level pad provides the stable foundation your pool system needs to run reliably for years.
If you have questions about your specific equipment, consult with a local pool professional to ensure your layout complies with local codes. Careful preparation now leads to a trouble-free swimming season later.